
You’ve reached your pitch and you’re about to put up your tent, already dreaming about relaxing and enjoying the great outdoors. However, when it comes to actually putting your tent up, you notice it’s damaged.
End of your camping trip, right? Not necessarily.
If your tent is literally falling to pieces, then you may have a big problem, but for most smaller damages, you may well be able to fix them yourself and carry on with your trip with the minimum of fuss.
We’ve put together a guide to tent repair and maintenance so you don’t get caught out in the wilderness with a leaky tent or broken poles.
How to fix a tear in a tent
Small rips
This is probably your biggest problem. If you have a rip or tear in your tent then it’s not really fit for purpose. Wind and rain (and maybe even wild animals!) will get in and make the whole experience utterly miserable.
If you only have a small rip or hole, then tent repair tape will probably do the trick, at least as a quick fix. Apply it to both the inside and the outside of the tent before covering with seam sealer.
However, be sure to choose the right kit. If you have a nylon tent, then you’ll need tape and sealer made specifically for nylon tents. Similarly, canvas tents will need taffeta repair tape and seam sealer for canvas. Using nylon seam sealer on a canvas tent could damage it.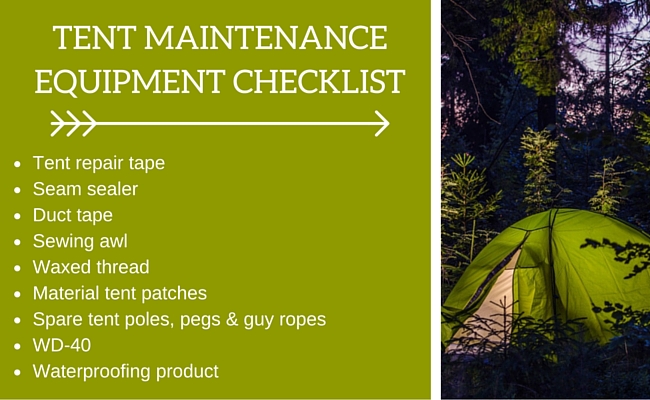
Large rips
If you have a large rip, then things get a bit more complicated and you may have to do a bit of crocheting.
In areas where the material is relaxed and can handle a little extra pressure, then you can pull the two sides of the material together, folding one side under the other, and sew tightly. You should use a sewing awl and waxed thread, ensuring the stitches are close together, before applying seam sealer.
If you aren’t able to pull the material together, you’ll need to use repair tape. Cover the damaged area with the tape, ensuring it about 1.5 inches longer and wider than the tear. Liberally apply seam sealer around the edges.
If you happen to have spare patches of tent fabric, then you can use these to fix the holes. This can be a little trickier than using repair tape, and this guide provides you with detailed info on how to fix a tent with a patch.
At the end of the day, if you’re really stuck then duct tape may do the trick!
How to fix leaks in a tent
Leaks may be caused by tears in the fabric of the tent. In which case, use the steps above to fix it.
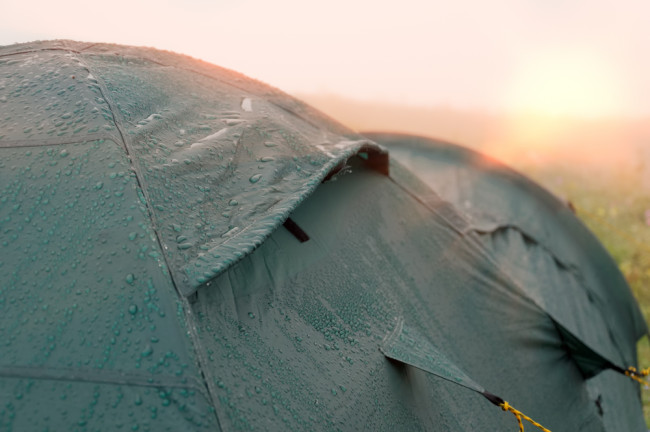
However, the most commonplace to get a leak in a tent is on the seams where two pieces of the fabric meet. If you notice water coming in through the seams, give them a wipe with alcohol or tent cleaner to clean them and then apply seam sealer.
Most modern tents are coated in a waterproof membrane, and after a while, you may find this starts to let water in. Liquids such as detergents can erode the membrane, so be careful if washing clothes near your tent. If necessary, you can re-apply the coating using a water guard.
Fixing broken tent poles
A common problem when camping is broken or bent tent poles. This could happen for myriad reasons - strong winds, overzealous when putting the tent up, someone standing on your tent, wear and tear, etc.
The most sensible thing you can do is simply pack a couple of spare tent poles so you can quickly replace any breakages.
HOW TO FIX BROKEN FIBREGLASS TENT POLES - DOWNLOAD OUR HANDY GUIDE
However, if you don’t have any spares, then our old friend duct tape is a good way of strengthening the poles. This can work particularly well if you don’t need to bend the pole. You can fix the poles properly when you get home, but you might just be better off buying some new ones.
If you’re really stuck, then you may have to go full-on Bear Grylls and use tree branches and twigs as makeshift poles, although this really is a worst-case scenario!
Fixing a broken tent zipper
Which part of the zip is broken will dictate how you go about fixing it. If the teeth are broken in any way, then you’re better of just replacing the whole zip, which is not something we’d recommend doing mid camping trip.
If the teeth are just misaligned, however, then running the slider up and down a few times will fix this most of the time.
If it’s the slider that’d broken, then you may be able to repair that. This guide will show you one way of doing it, using a pair of pliers. If the slider is jammed, then you may be able to loosen it using some WD-40, although be very careful not to get any on your tent's flysheet.
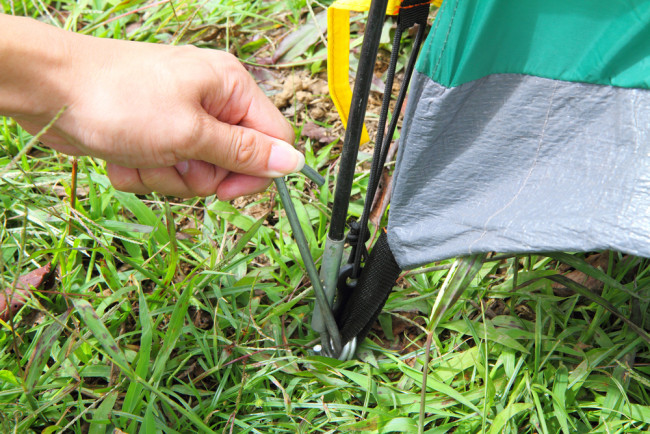
How to fix bent tent pegs
Bent tent pegs are a pretty common occurrence, especially if they're cheap and have been subjected to a fair bit of hammering. If your tent pegs become bent, then you can try bending them back or knocking them back into shape with a mallet (taking care, of course). If that’s not working, then you could heat them up over a camping stove, making them much more malleable. Take extra care when doing this.
It’s always handy to have a few spare tent pegs anyway, just in case.
Prevention is better than cure
As with most things in life, prevention is much better than cure, so if you can try and guard against damaging your tent in the first place, you can save yourself a great deal of hassle later on.
How to store a tent properly
If you store your tent away properly then you’re giving yourself a fighting chance the next time you come to get it out again.
You should always try and pack away your tent when it’s as dry as possible. This isn’t always possible (especially in the UK), but if you leave your tent wet then mildew will more than likely start to form, which is impossible to remove. If you do have to pack your tent away wet, then it's incredibly important to unpack and dry it out as soon as you get home.
Ensure that all of the tent is dry. Areas such as pegging points and guy lines can be deceptive, so always double-check.
If you notice any breakages or damage to your tent, then fix or replace before storing away. The last thing you want is to forget about that tear until you’re about to go camping again.
Check your tent before you go away
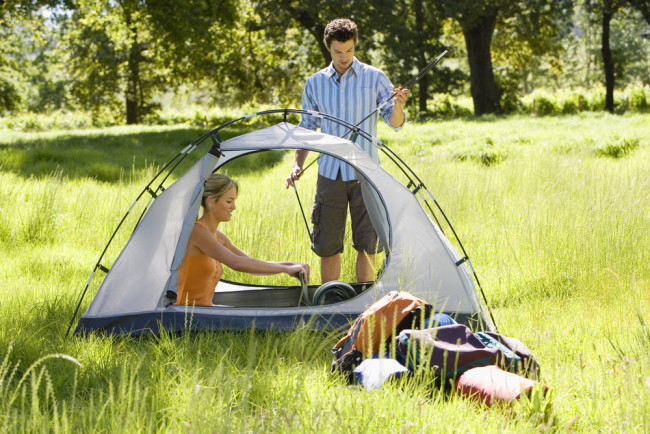
Even if everything was fine and dandy when you last put your tent away, it's essential to get it out again before you go away. And don't just get it out of the bag - actually pitch it.
This way you'll see if there are any damages you didn't notice last time or if any mildew has started to build up. It's also good to refresh your memory about how to put it up, so you're not struggling when you reach the campsite.
Tent pitching tips
How and where you actually pitch your tent can have a big impact on its durability and lifespan. Always try and pitch your tent on level ground, clearing away any rocks or other items that may lead to tears.
Exerting too much pressure on the tent is one of the biggest causes of damage, so try not to stretch or force it too far. Always make sure it has a bit of room to give, particularly if it’s windy.
Finding somewhere slightly secluded or sheltered is a good idea when pitching a tent. This should ensure protection from the wind, and staying away from thoroughfares should reduce the chance of something standing on your tent.
Always be prepared
You never know when disaster could strike and you may need to repair your tent. Always carry the necessary equipment with you, so you can fix damages and stay warm and dry. See our equipment checklist above and check out our full range of tent repair products.
However, if your tent really is beyond repair and you need a new one, then our fantastic range of tents will most definitely have something for you.
Do you have any tips on tent repair and maintenance? Let us know in the comments below or on Facebook or Twitter.
Take a look at our full range of tent accessories or entire tents collection including:
Tents by Size | Family Tents | Polycotton Tents | Tents by Brand
Read more from the Winfields Blog to set you up for 2020...
⛰ 🏕 🌳