
Sheltering us from the storm is tough duty. Rain and wind, along with ultraviolet (UV) rays on sunny days, exact a toll over time. Repeated tent setups and takedowns also cause wear and tear. Lastly, even though most tents are made of sturdy stuff, accidents can (and do) occasionally happen.
Think of taking good care of your tent as either a way to thank it for taking good care of you or a way to maximize your gear investment dollars—or both. Keeping fixable tents in use and out of landfills is also an important part of developing a circular economy in outdoor gear.
With the right supplies, you can do many of these simple tent repairs in the field and handle more involved fixes at home:
- Fix a hole in the tent fabric or mesh
- Fix a sticky zipper
- Seal leaks in the seams
- Splint a broken or bent tent pole
Note, too, that basic tent care is also critical to longevity. For details, read our Tent Care article.
Professional Repairs
If your tent’s repair needs are beyond your comfort or skill level, you still have options. REI Co-op’s professional repair services include partners like Rainy Pass Repair, one of the nation’s largest outdoor product repair services, and TentPole Technologies, which specializes in tent pole repairs.
Patching Holes in Your Tent
Sharp sticks, stones and errant tree branches can sometimes rip your tent’s fabric. If you carry a patch kit with you while camping or backpacking, you can repair a tear in a tent’s wall, mesh or rainfly while you’re out there. Or you can wait to do it at home.
Video: How to Patch a Tent
Patching Holes in Your Tent’s Fabric Panels
Supplies:
- Rubbing alcohol
- A rag
- Scissors
- Repair tape, such as Tenacious Tape™
- Mesh patch (if patching a mesh door or window)
Here’s how to patch a hole in your tent:
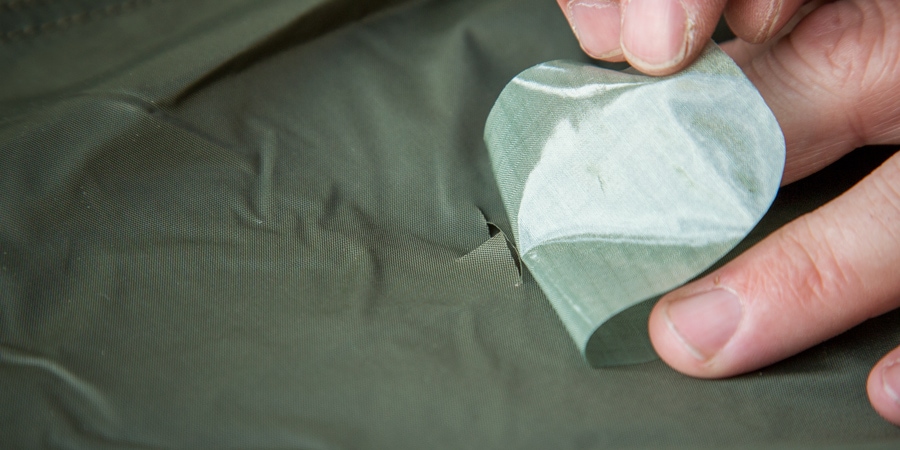
- Clean the fabric: Working on the exterior of the tent, apply rubbing alcohol to the rag and clean the area around the tear. Allow a few minutes for the fabric to dry.
- Prep the repair tape: Cut a piece of repair tape to cover the hole, leaving at least one inch of fabric surrounding it. Round off the corners of the tape to create a circle-shaped patch.
- Apply the tape: Lay the tent fabric on a solid surface, remove the backing on the tape patch and press it into place.
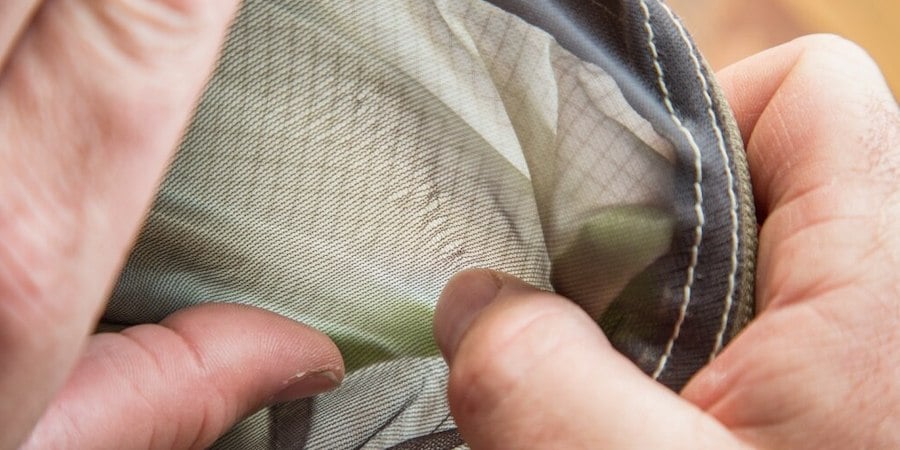
- Add an interior patch if needed: If the tear is in a high-tension area, like near a pole, also apply a patch to the inside of the tent.
- Let the patch cure: Let the patch cure for a day before packing the tent away.
Patching Holes in Your Tent’s Mesh Panels
If your mesh netting gets snagged, try to work the mesh strands close together again. If the damage is more severe, you can repair it using a mesh patch.
If you have a hole in a mesh door or window, here’s what to do:
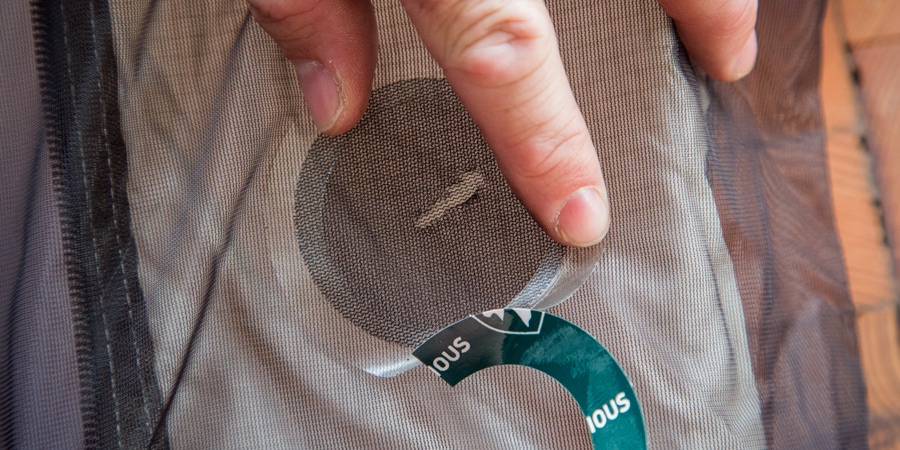
- Set up your work area: Lay the torn section on a flat surface.
- Prep the patch: Center the mesh patch over the hole and remove the backing from the ring of repair tape on the patch.
- Apply the patch: Check the alignment of the patch and press it into place.
- Allow the patch to cure: Let the patch cure for a day before packing the tent away.
If you don’t have a mesh patch, you can also use a solid patch for the repair. (The fix won’t look as clean, so think of it as a well-earned scar from one of your great adventures.)
Lubricating a Sticky Tent Zipper
Trying to force a zipper that jams is a great way to cause more serious damage to the tent. Always check to be sure that the cause isn’t simply fabric that got snagged.
If a zipper gets sticky, here’s what to do:
- Clean the zipper: Brush out any grit or debris from the zipper.
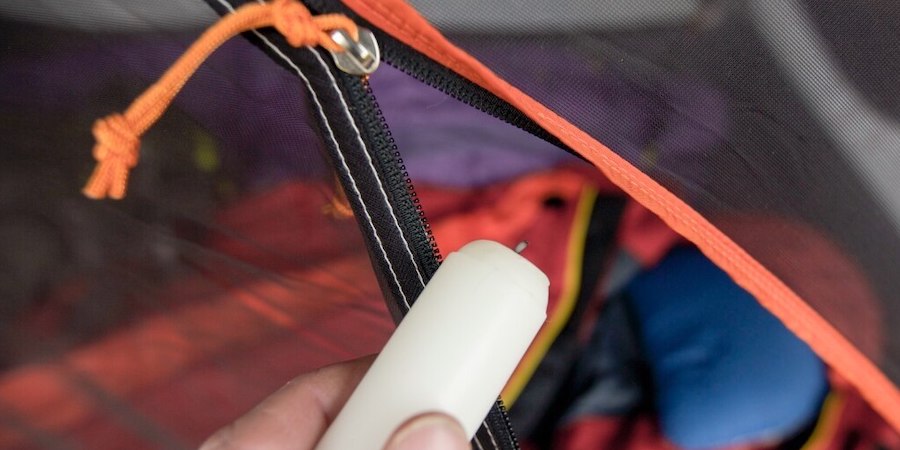
- Do a quick fix in the field: If you’re in camp, you can use an unscented candle to do a temporary fix: Rub the candle along the zipper teeth to help it operate more smoothly.
- Lube the zipper at home: When you get home, apply a zipper clean/lube product. (Leaving the candle wax in place will attract grit that leads to the zipper sticking once again.)
Sealing Leaks in Your Tent
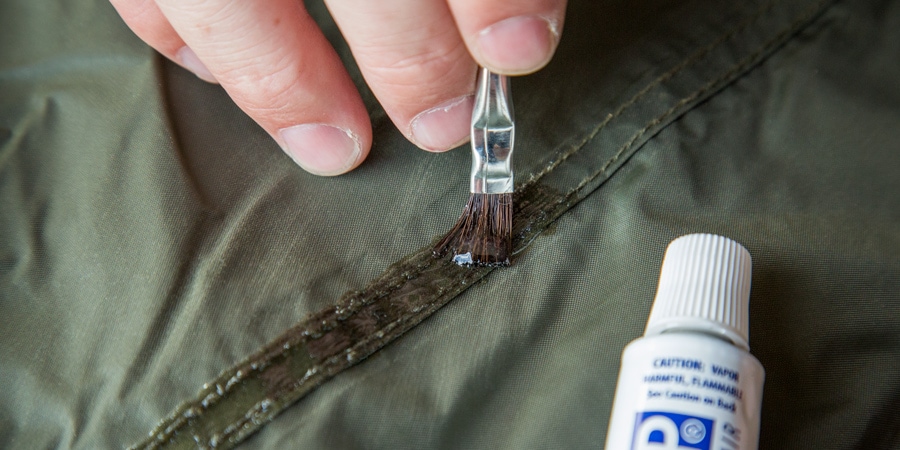
Seams are vulnerable areas, so inspect your tent seams periodically for damage or signs that water is sneaking in.
Supplies:
- A rag
- Rubbing alcohol
- Seam sealer: Silicone-treated fabric needs a different sealer than polyurethane-coated fabric (what most tents have); ask the manufacturer if you’re unsure which type of coating you have.
Here’s how to seal seams:
- Set up your work area: Set your tent up in a dry, brightly lit spot. Seam sealing is done on the inside seams, so lay out your rainfly upside down.
- Identify your problem areas: Examine all the seams to identify where the sealer or seam tape has worn out. If you find many failing areas, consider applying new seam sealer to all seams.
- Remove loose seam tape: If you find loose seam tape, gently remove peeling sections. (Leave intact sections in place.)
- Clean seams: Prep seams by gently cleaning them with a rag and rubbing alcohol. Allow a few minutes for the fabric to dry.
- Apply seam sealer: Apply new seam sealer, then use the included brush to spread it into a smooth, even coating.
- Dry completely: Allow the seam sealer to dry completely.
Note that condensation can sometimes build up and drip inside a fully seam-sealed tent. To help prevent that, follow best practices when you pitch your tent. Also, older tents can sometimes leak because the overall coating on waterproof fabrics (like the rainfly) is wearing out. When that happens, you need to renew the coating to restore waterproof performance.
It’s also helpful to renew the durable water repellent (DWR) coating on your tent’s waterproof fabrics. This will improve overall water-shedding performance in the same way that DWR renewal does on a rain jacket. As a bonus, some tent DWR renewal products also enhance resistance to UV rays. (UV rays gradually degrade tent fabrics, which is why you should also avoid leaving yours set up in the sunshine for extended periods of time.)
Splinting a Broken Tent Pole
Whether your tent pole gets stepped on or a powerful gust of wind does the damage, a kinked, split or snapped pole needs immediate attention in the field. After your return home, replace the pole or have it permanently repaired.
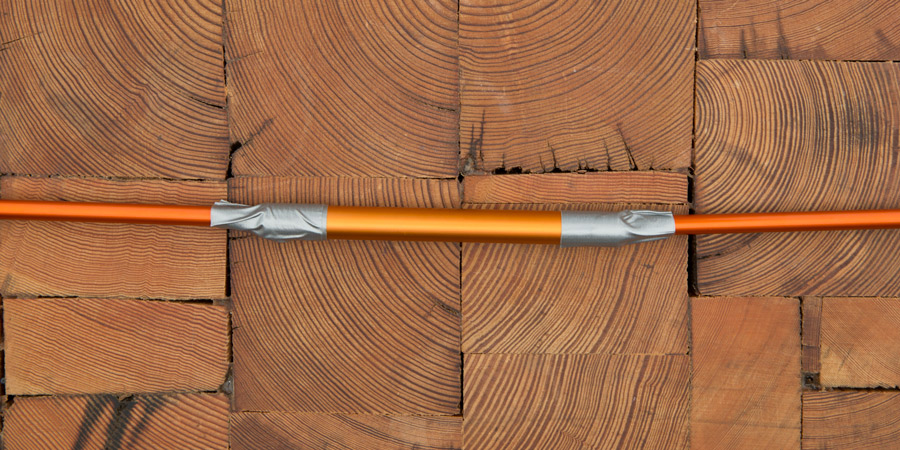
Using a pole repair sleeve: The easiest and quickest way to fix a broken pole is with a pole repair sleeve. Also called a splint, this short tube is often provided with your tent. If not, buy one and pack it with you. A good pole repair sleeve is just slightly larger in diameter than your pole so that it doesn’t move around too much. Using a repair sleeve to fix a broken tent pole is simple:
- Prepare the pole: Line up the broken pole sections. If the pole is bent but not fully broken, gently straighten out the bend.
- Slide on the sleeve: Slide the sleeve over the pole end until it’s centered over the break or kink; you might have to use pliers to crimp or a rock to bend splayed pieces so that the sleeve can slide over them.
- Tape the sleeve: Wrap each end of the sleeve/pole a couple of times with duct tape, or whatever heavy-duty tape you have on hand.
If your pole breaks where one pole end inserts into the next one, you will have to splint the sections together; keep in mind that this will prevent the poles from folding up neatly when you take the tent down.
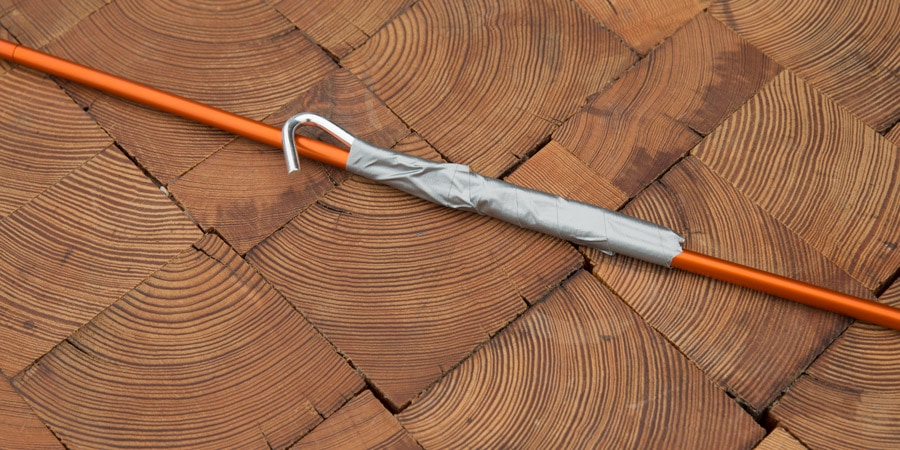
Using a tent stake as a splint: If you’ve lost or forgotten your pole repair sleeve, you can use a tent stake to concoct a crude splint:
- Prepare the pole: Line up the broken pole sections. If the pole is bent but not fully broken, straighten out the bend.
- Align the stake: Align the stake so that it’s centered next to the break.
- Tape the stake: Wrap each end of the stake/pole multiple times with duct tape, or whatever heavy-duty tape you have on hand.
To learn more about tent-pole repair, including how to replace shockcord, see our article, How to Fix a Tent Pole.